
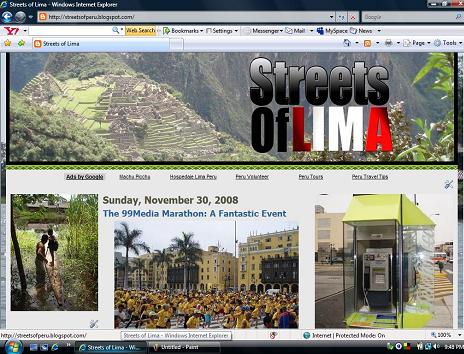
One of the annoying things about Blogger is that when you load up your photos to be published in your blog body it automatically crops them down. Personally, I like having really big photos, but even when I use the extra large setting my photo doesn't expand to fill up the entirety of my blog space as defined in the "main wrapper" portion of my HTML code. In short I want this:
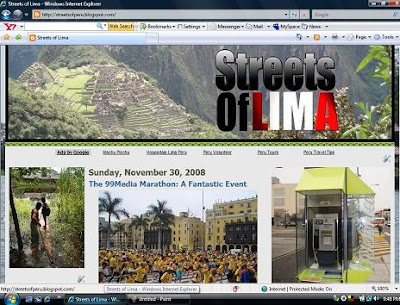
But I get this:
However, this is pretty easy to fix, and since this is one of those cases where I actually figured this out for myself, I can tell you the solution without having to provide any annoying links to other pages.
Here is an image of the blogger code you get when you load up the page. Notice that I have highlighted three parts. These are the three numbers you're going to have to change.

What happens with blogger is when you upload a photo it reduces it but then installs the code so that when the user clicks on the photo, he/she is taken to a blank page with a full sized image of the photo. The code for this series of commands is contained in the first 1.5 lines of the image code above (the one that has: 'a href="http....'). If you look, you'll notice that there is a part in that code that says "s1600-h". That is the part that indicates that this is the "full-sized" image. Later in the code (the third circled segment) there is a line of code that is identical but it ends in "s400". So, all you have to do to ensure the larger image is being displayed is change "s400" to "s1600" leaving out the "-h".
You'll also notice that the middle of the code establishes width and height (as circled above). These too you will have to change. Now, it's important to remember that you need to crop down your image size manually before you upload in order to get this to work right! I just do it in paint. If my image is 1024pixels wide and I need to reduce it to 464 pixels I just use a simple proportion to find the % of reduction (1024X=464, X=464/3000, X=45%) and then type it into both the horizontal and vertical spaces in the Resize/Skew feature found under the "Image" option. Then you go to "attributes" on paint, get the hight attribute (you already know the width is 464), and fill them into your picture code in your blogger.
Here's how it should look:

Congratulations! You've just produced an image as big as your "main-wrapper" will allow.
The process is actually pretty easy when you get the hang of it, it's just kind of annoying that blogger didn't put a "fill 'main-wrapper'" option among their sizing choices.
One other little trick I have for you is that it's best to crop your images down to a perfect square (464X464) that gives you less to remember when you're changing the height and width paramaters in the blog code. When it's square, they're both the same (I only mention this because we all already have too many numbers to think about).
Note, if you want you can adjust only the height and width parameters and not mess around with the "s1600-h, s400" nonsense, but what this tells the computer to do is expand the image it has reduced and the end result is that it is displayed pixilated.
Good luck!
No comments:
Post a Comment